
Here’s a sweet & simple No-Sew DIY Charlie Brown halloween costume with printables! It’s just reality that some years you’ll have lots of time to invest in planning and putting together your kiddo’s halloween costumes, and others you’ll be scrambling to get something together last minute. You are not alone! And luckily there are plenty of great, easy costumes to put together in a pinch – as is this Charlie Brown costume! Take a look…
TRADITIONAL CHARLIE BROWN GARB
Charlie Brown’s look is made up of a golden-yellow, collared shirt with a black zig-zag accent, black shorts, golden-yellow socks, brown lace up shoes, and a wiry single hair. Luckily for us, Charlie’s look is easily recognizable even if not every element is the exact same as the character. That iconic zig-zag pattern is what’s going to make your costume. Luckily this means that you’ll have some flexibility with shirt, pant and shoe type. So let’s take a look at what you’ll need.
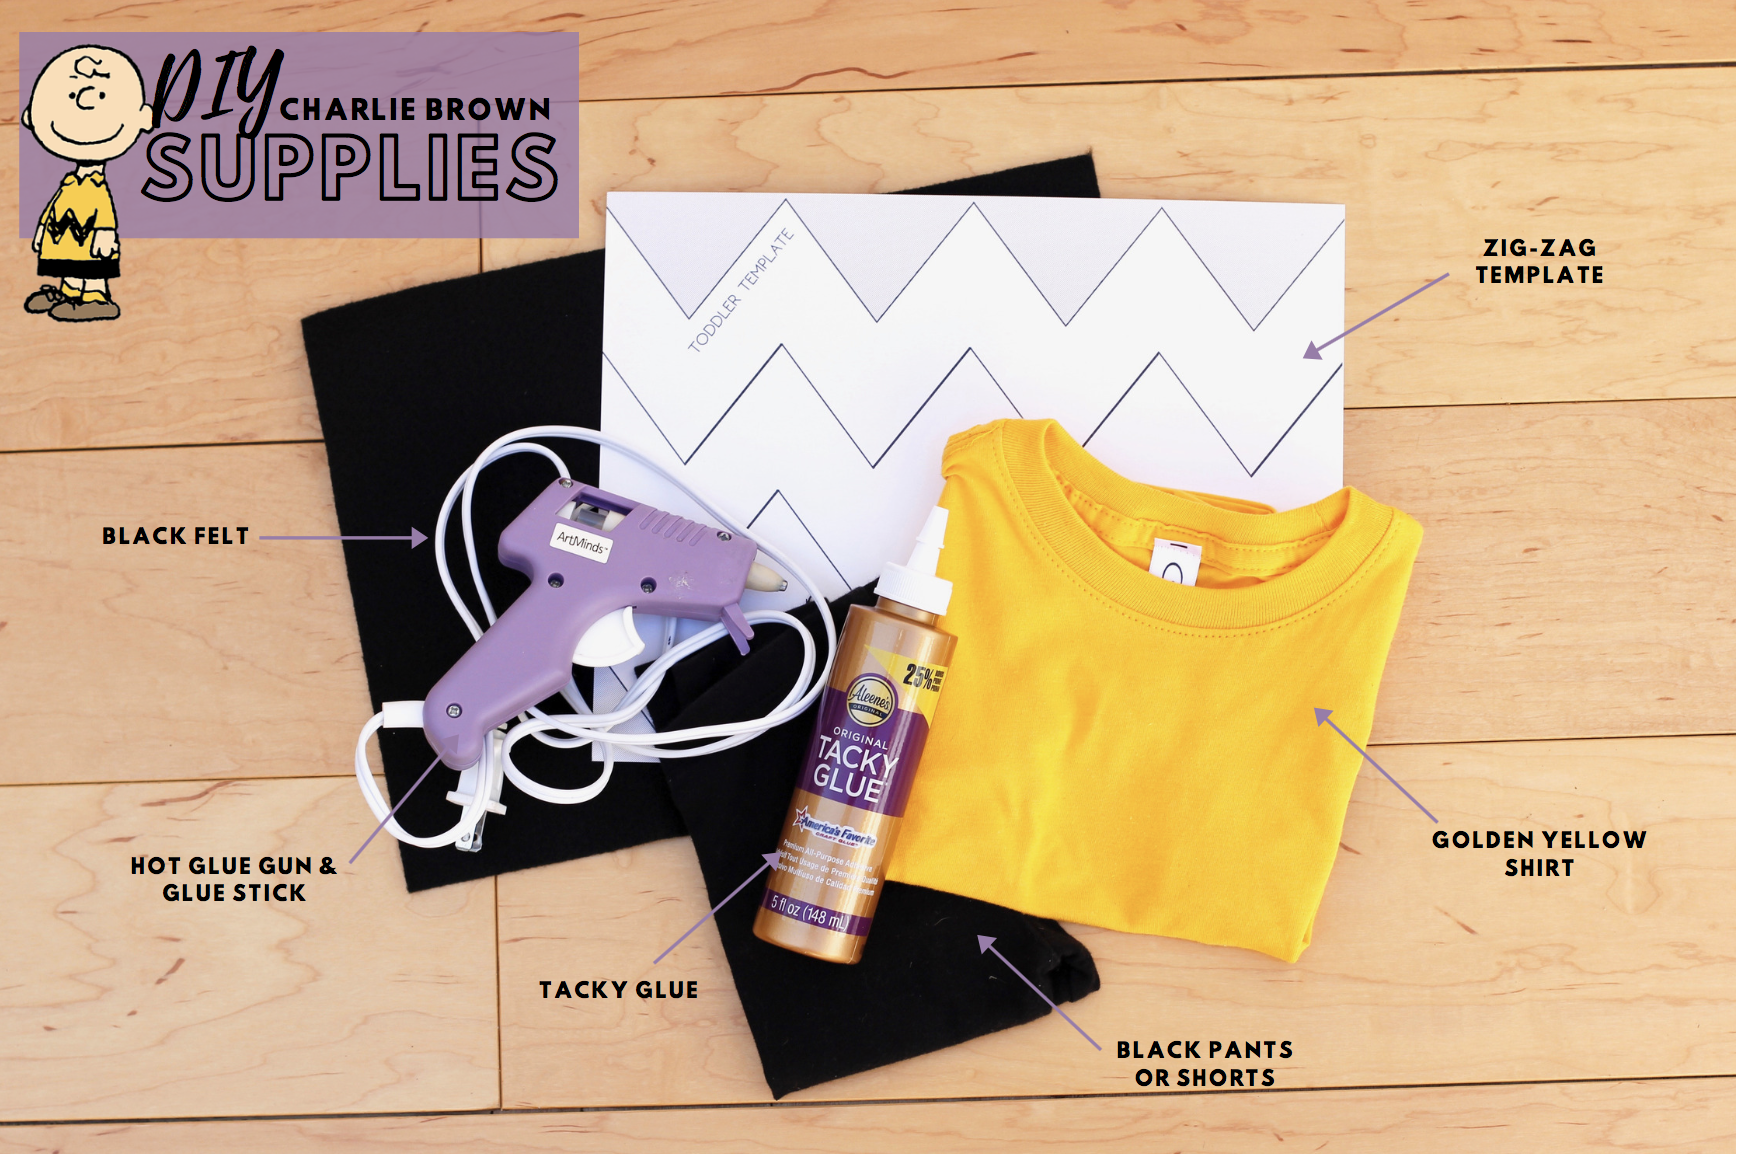
SUPPLIES
- Golden Yellow shirt/onesie
- Black pants or shorts
- Black felt
- Hot Glue
- Craft Scissors
OPTIONAL SUPPLIES
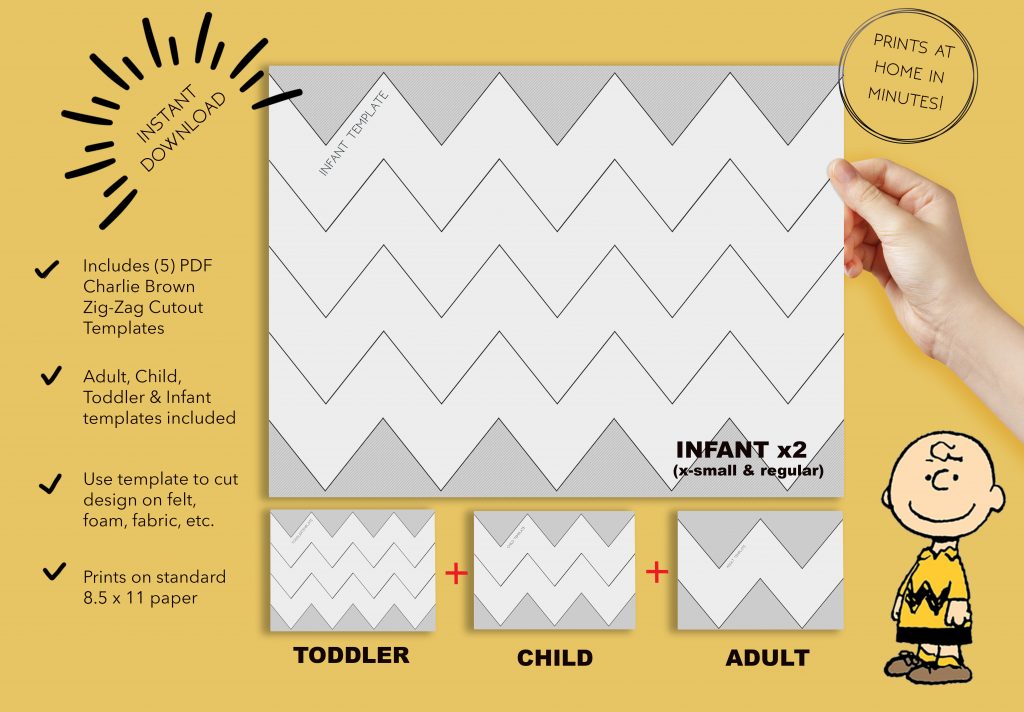
- Zig-Zag Cutout Template
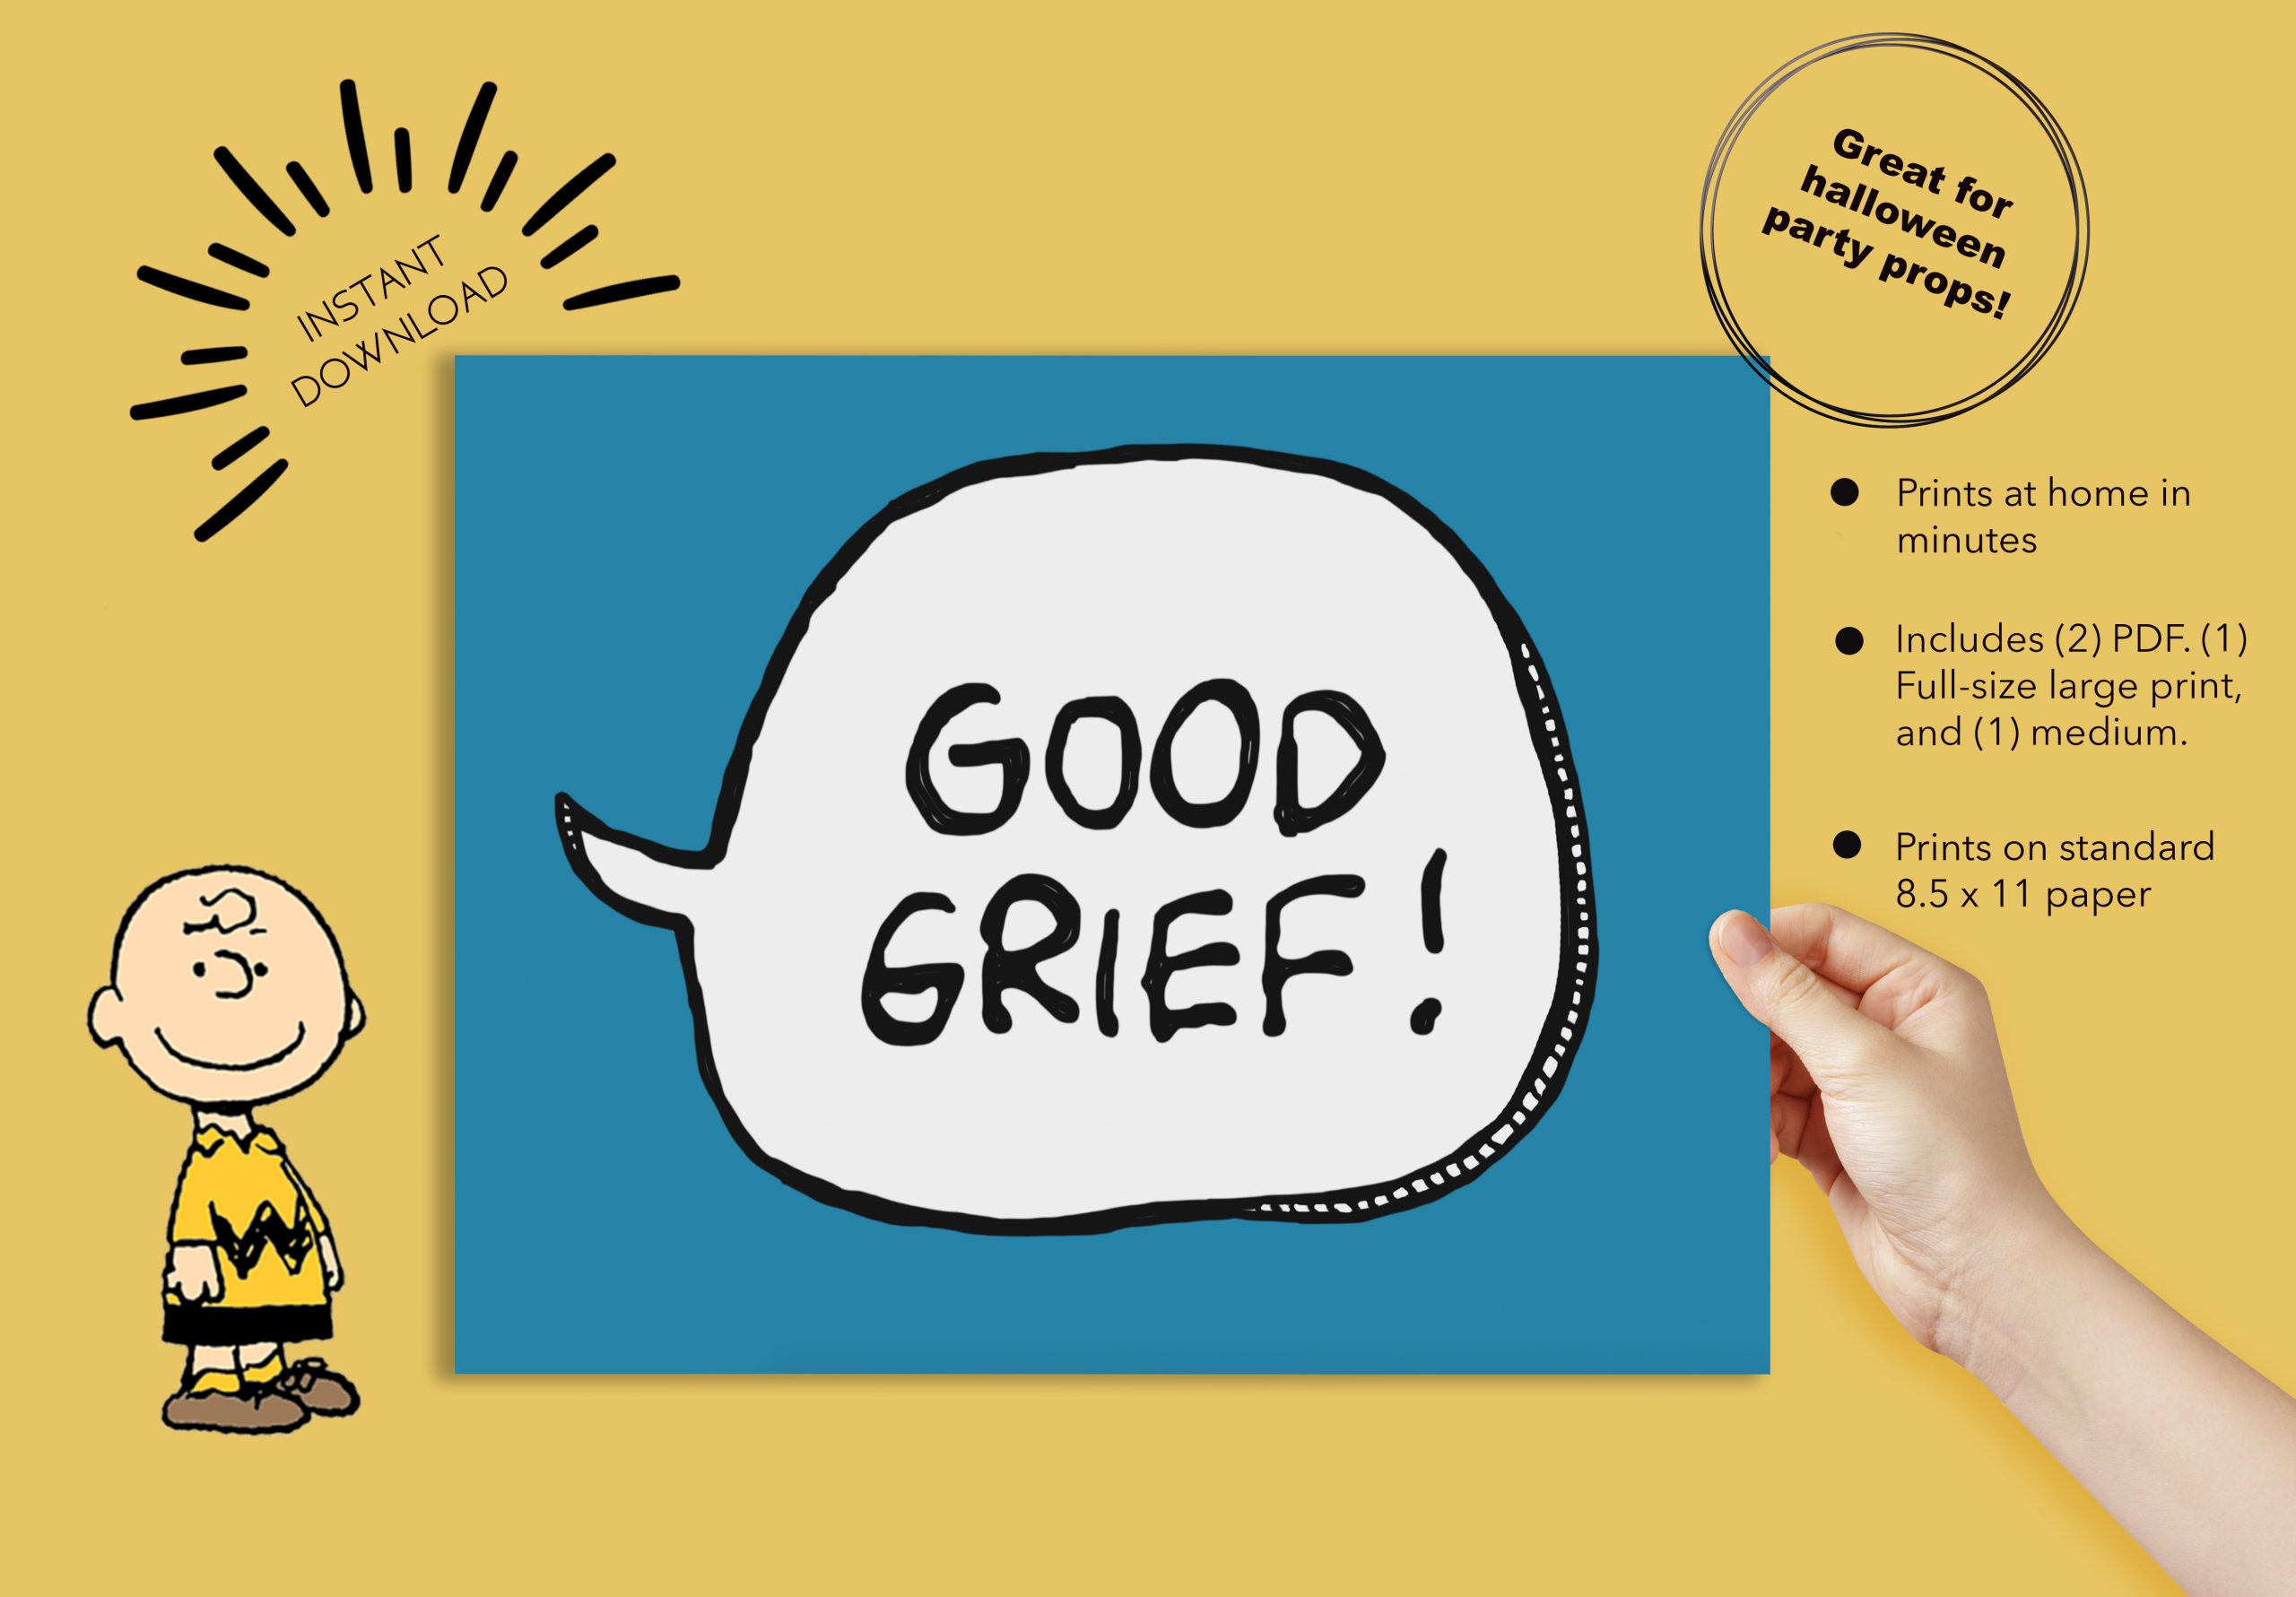
- Good Grief Template
- Snoopy stuffed animal
- Eye liner/black face paint
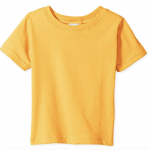
We didn’t have any plain golden/yellow shirts of any variety on hand unfortunately, but I was able to find this plain gold Tee-shirt. It was good quality, inexpensive, came quickly, the perfect color, and best of all, kept us out of the stores! I know it’s not a collard shirt, but it checked all the other boxes and I was super happy with it.
IT’S ALL IN THE ZIG-ZAG
For the iconic black zig-zag, I opted to use black felt. Having worked with felt for the first time just weeks before, I’ll have to be honest, I was thoroughly annoyed, beyond frustrated and ready to swear off felt for eternity. No joke – cutting felt was not as easy as others made it appear!! Weeks earlier, I kept ending up with wonky cuts and sloppy edges regardless of what I tried. So I changed my game strategy – here’s how.
I started by using this printable template to help guide my cuts. It comes in 5 sizes (varying from baby to adult), and after taking a look at each, I opted to use the “toddler” size zig-zag template for her costume. If you decide to use the template, make sure to print on card stock (this will come in handy later), and make sure to print US Letter Borderless because it is a full-bleed design! If you don’t, the design will be cut off and the connection points won’t be right.
After printing the template, I opted to glue it to the back of my felt with Tacky Glue. After trial and error, I found that if you glue a template onto the back of the felt it helps add structure. Your edges will look much cleaner – trust me! After gluing the template, I then cut out the design with craft scissors while the glue was still just a little damp. Once I was done cutting, I carefully peeled the paper off the felt right away before glue had a chance to dry completely.
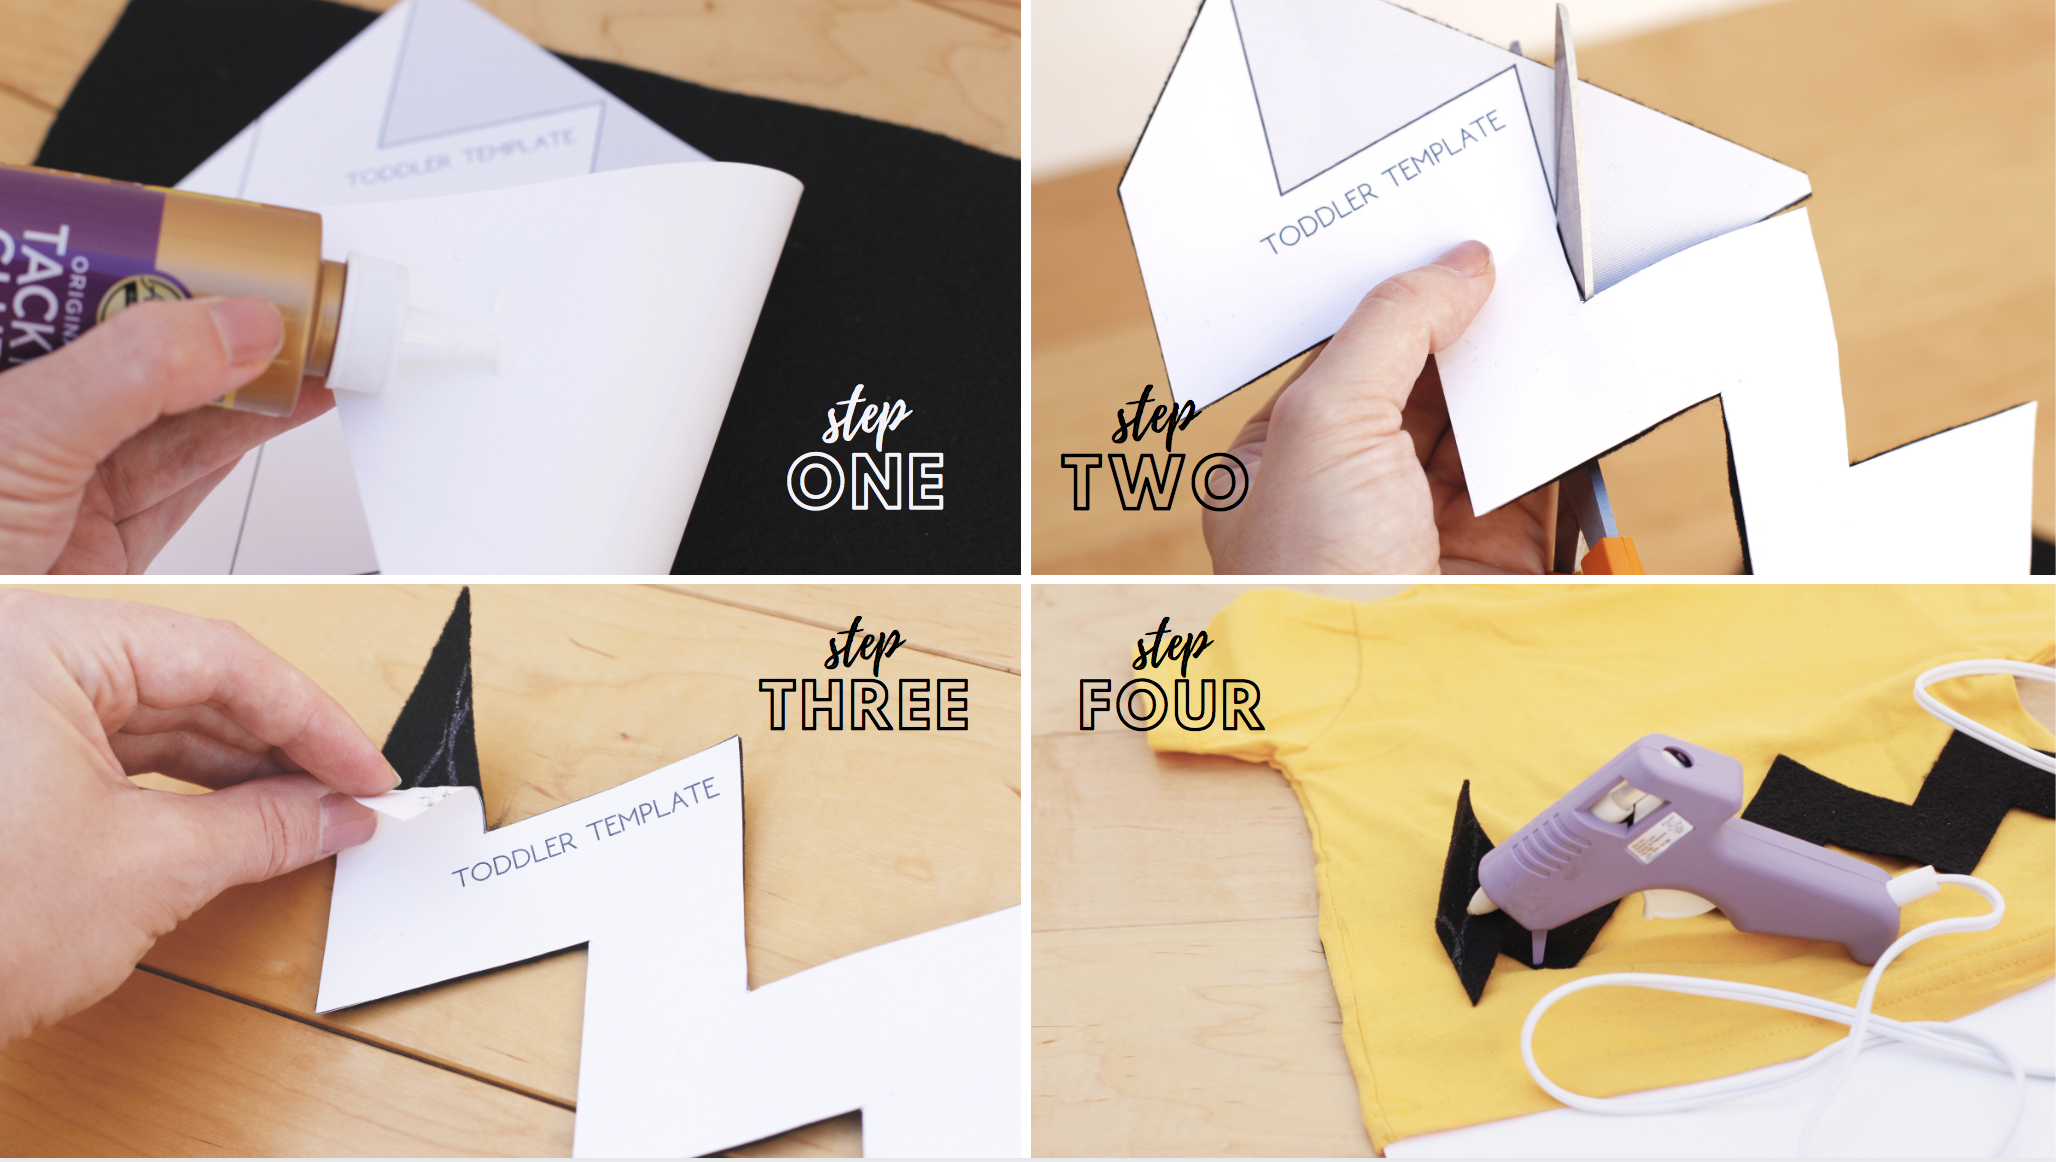
Once I had my felt design cutout, it was time to apply to shirt. I first laid out the cutouts onto the shirt to see if/how much more material I would need, where the connection points would be, etc. Luckily for us, her shirt took almost exactly two rows of zig-zag with only a little gap. I started gluing (using hot glue gun…NOT Liquid Stitch, see below) at the seem line and glued the zig-zag little by little from left to right. Again, I had a small gap left over right near the seam which, after a small freak out, I simply filled in with permanent marker and you can barely tell the difference. Disaster avoided ha!
Again, every shirt size will be different and may require some ingenuity in figuring out the best way to piece your zig-zag pattern together to minimize weird connection points. If you know you will not have a perfect connection point, I’d suggest making sure that point is in an area least visible, such as under the arms. That will be less noticeable than right in the front or back of your little Charlie Brown’s shirt.
LEARN FROM MY MISTAKES:
-
- Cutting felt is NOT as easy as it appears. I struggled with this A LOT, and found that temporarily gluing a cardstock template on the back helps tremendously in making your lines crisp and clean. I know there are other ways to help this (like the use of wax paper), and I’ll learn more/share more on that later. But in the meantime, and if you don’t have wax paper on hand, give my method a try!
- Liquid Stitch does NOT work for this project. I first used Liquid Stitch on a tester to see what it would look like once dried. The glue did not dry completely clear and absolutely showed on the black felt. That is why we switched to using hot glue gun instead.
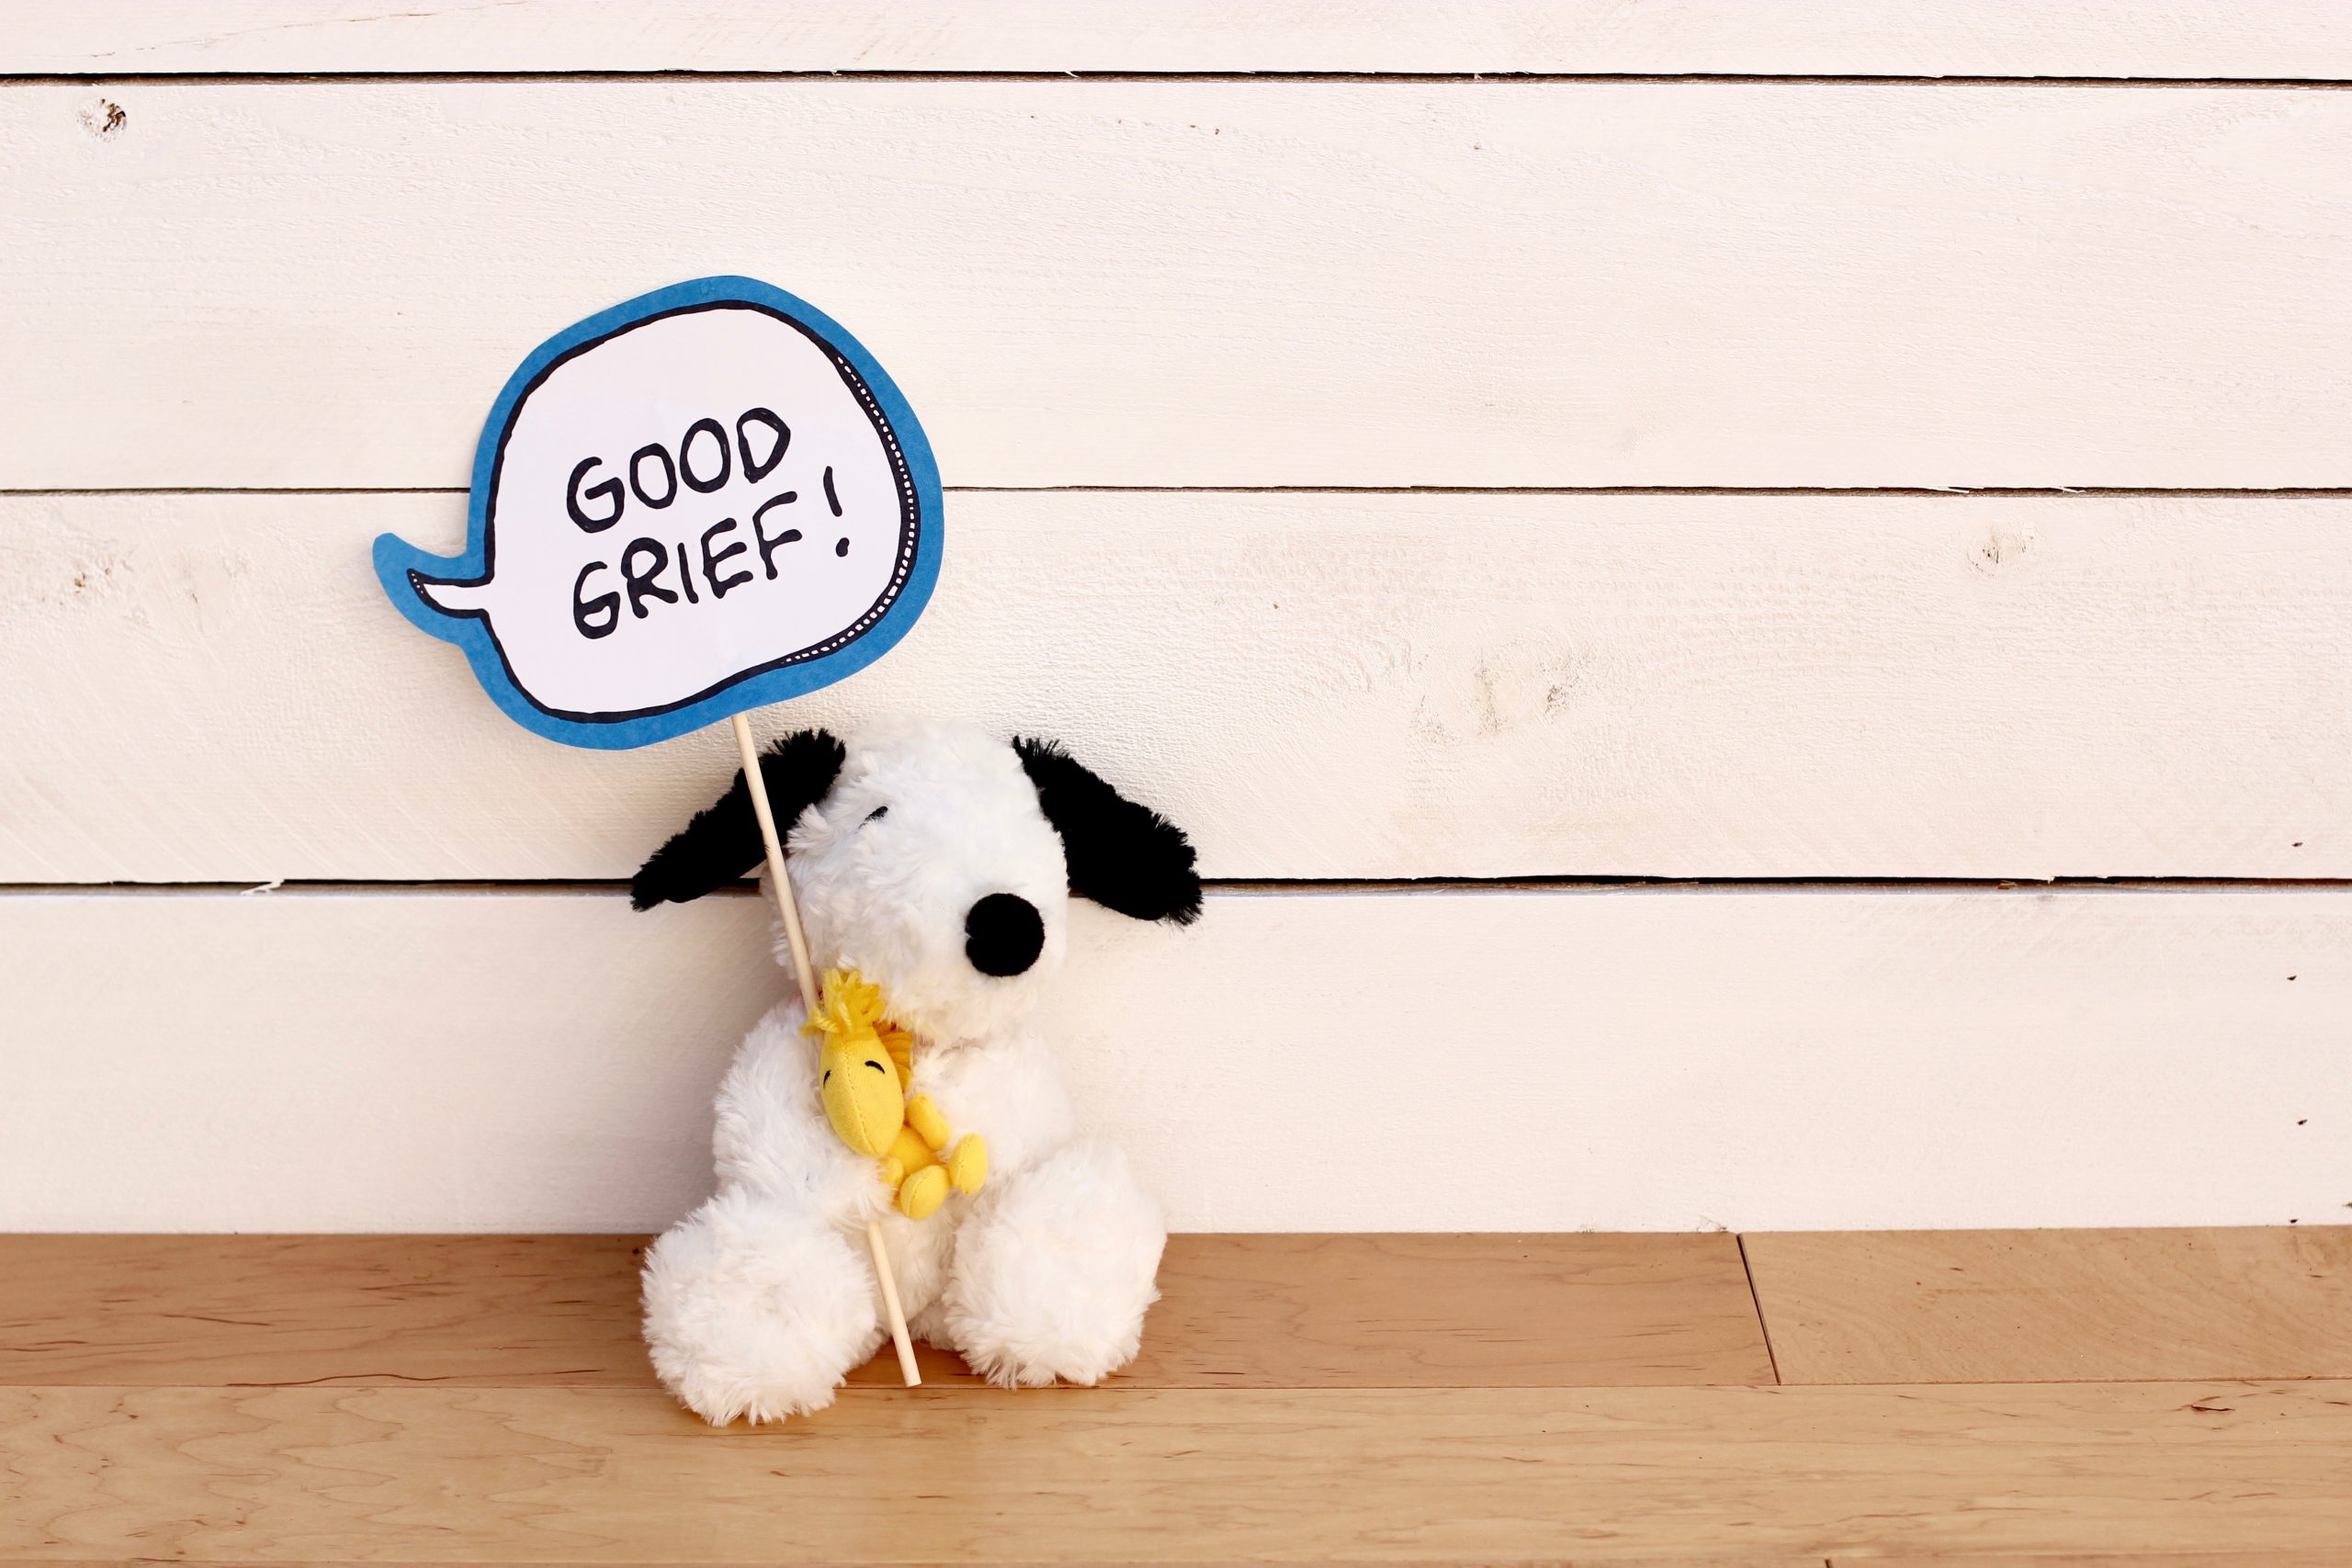
GOOOOOOD GRIEF
No other phrase screams Charlie Brown more than his infamous “good grief.” It’s a super cute add-on for your kiddo’s costume…if you can get them to hold it! I cut out this Good Grief printable and glued to a small dowel for her to hold. Let’s be realistic, my little only held for pictures and once every once in a while when she felt like it, but it was cute nonetheless! You could absolutely tape/glue onto their halloween bag/bucket so they have it with them the whole time without having to hold onto one more thing. Trust me, they aren’t letting go of their candy bags, so that’s a safe bet!

PUT IT ALL TOGETHER
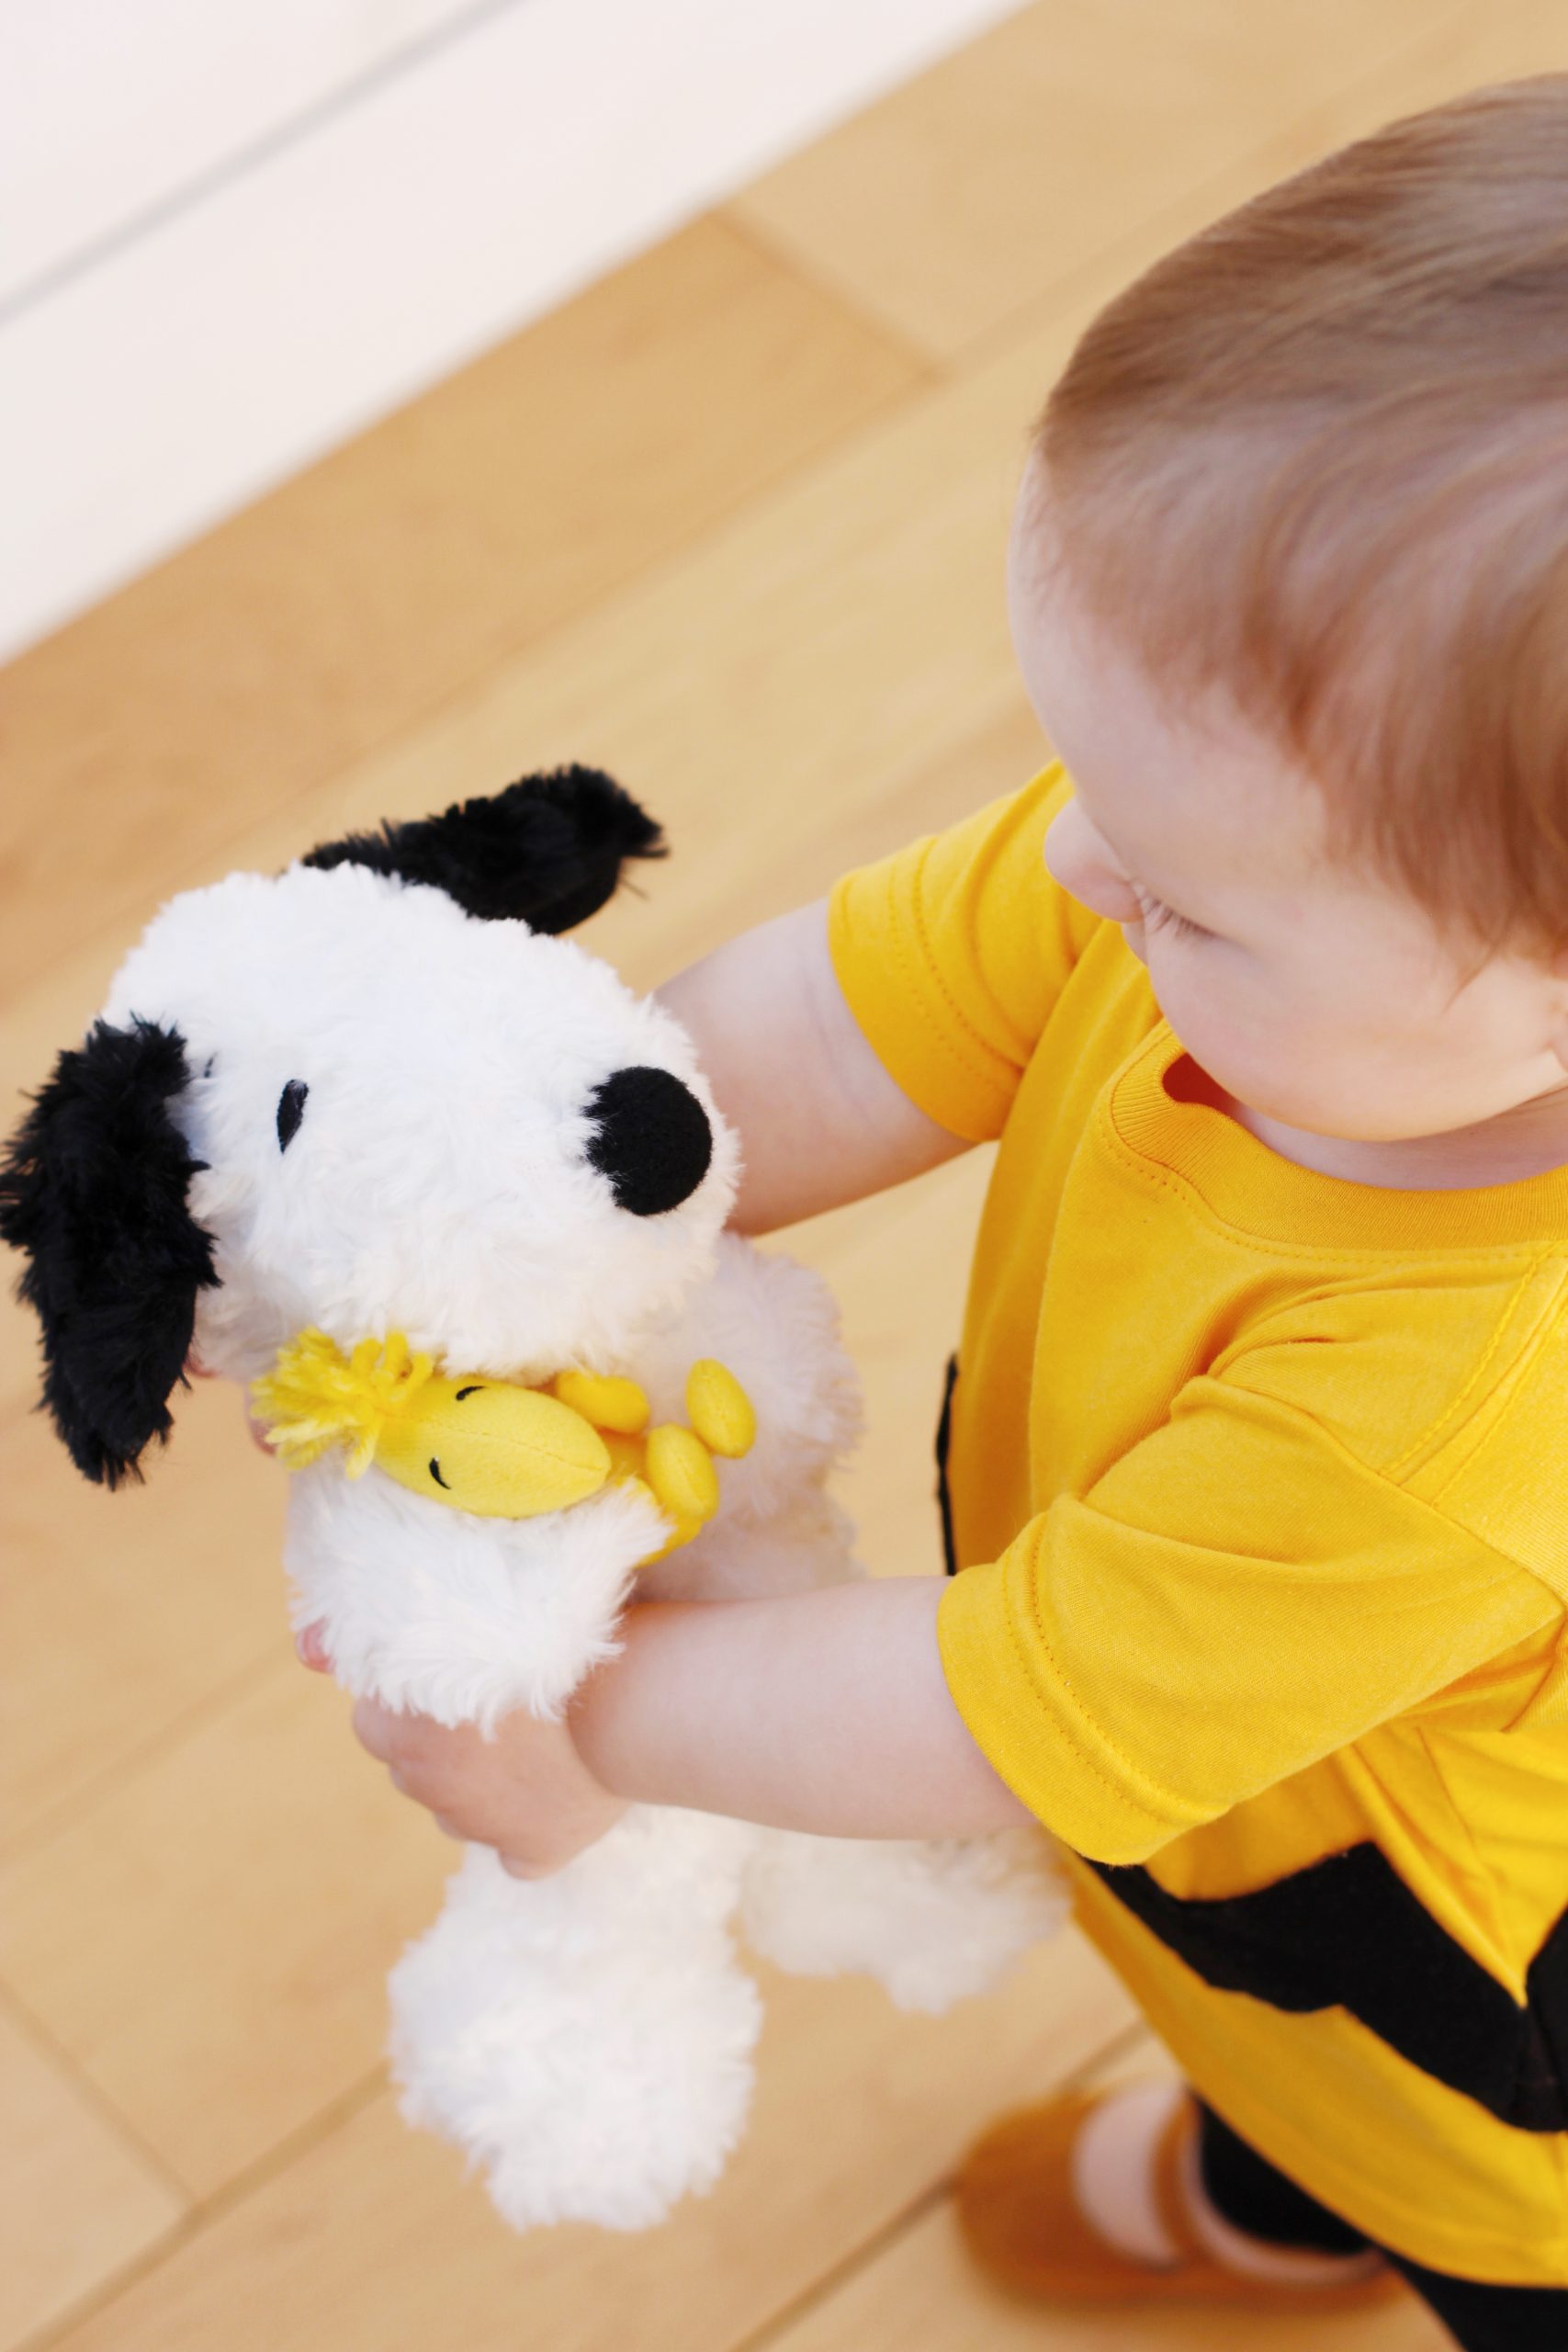
Time to get the gang together. Add a Snoopy stuffed animal and you’ve got the look put together! If you don’t have one, try asking neighbors and friends. There’s likely someone local who is a snoopy fan and has one lying around. I was so stoked to find one through a local neighborhood Facebook group – thanks neighbor!!

ADDITIONAL OPTIONS:
- Another traditional marker of Charlie Brown is his hair….or lack there of. He sports one wild hair at the top of his forehead. To add this, you can use liquid eye liner or non-toxic black face paint if you have that on hand!
- Lastly, if you’re feeling ambitious, you can tackle making Snoopy’s dog house. I’ve seen some really cute one done with cardboard when out trick-or-treating. I applaud you mamas and papas out there!
2 comments
[…] Charlie Brown DIY Halloween Costume via raising indie […]
Thanks for thr great article!